
Everyday Challenge: Composite Restoration
Workflow for direct composite restoration of a deep cavity in the posterior region
The author describes the initial procedure for deep cavities based on composite restoration in the posterior region (tooth 26). In particular, he focuses on the preparatory measures which, in addition to etching, bonding and the actual composite restoration, are decisive for success. This includes, in particular, adequate preparation of the field of work – key words: rubber dam, sufficient inversion, sandblaster and matrix and their fixation.
Initial situation
A 25-year-old female patient presented at the dental practice for a routine check-up. She went to the dentist regularly and had no complaints. Bitewing radiographs were taken to diagnose caries. This revealed an insufficient filling on the mesial occlusal surface of tooth 26, which continued into the proximal region (Fig. 1), which was not immediately apparent on visual inspection (Fig. 2). The cold test was clearly positive. The patient was therefore informed about renewal of the filling on tooth 26.
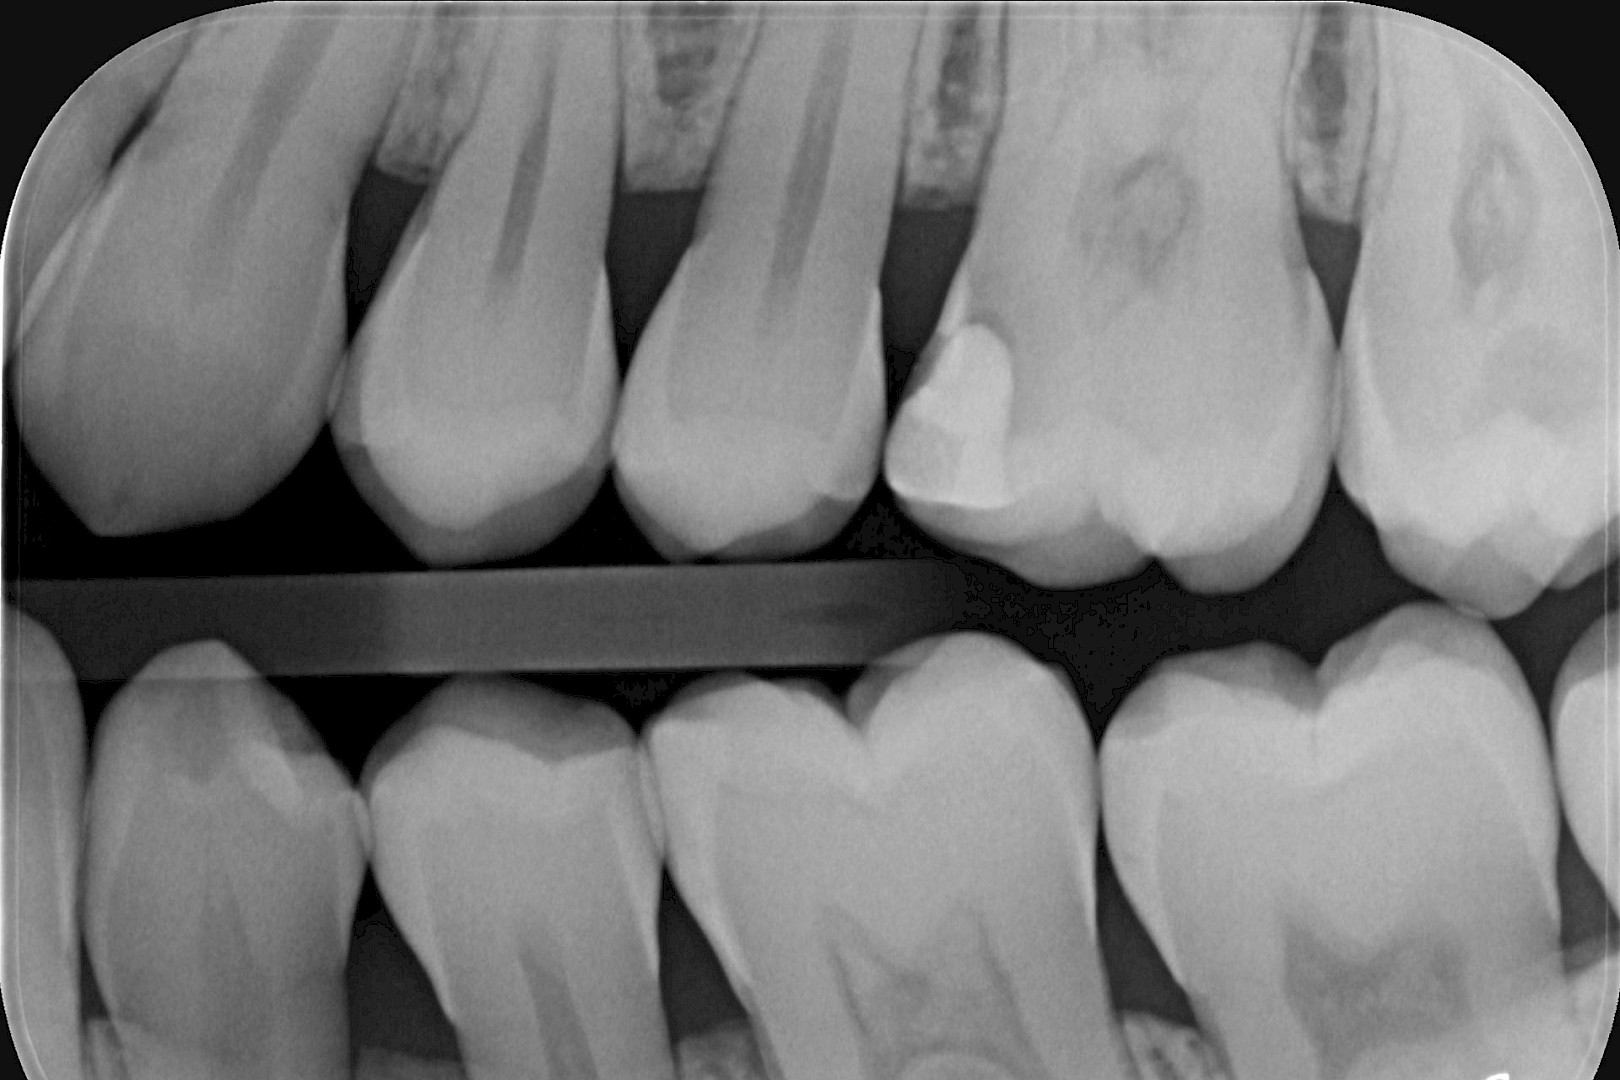
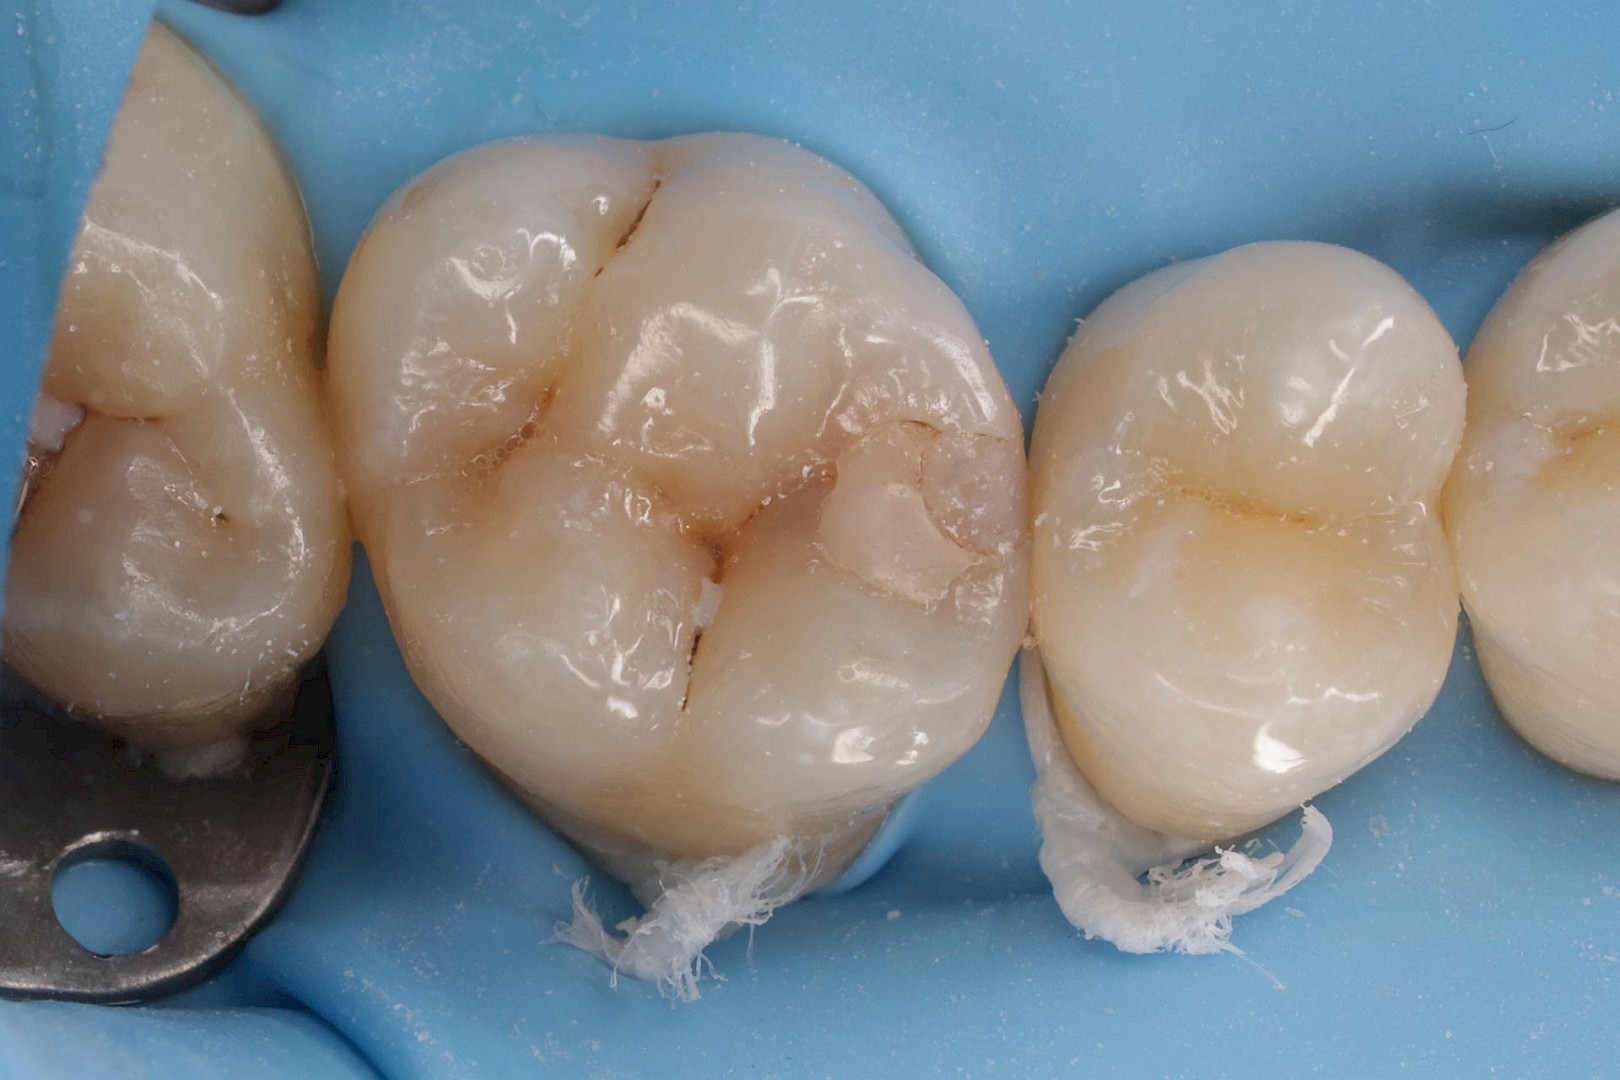
Fig. 1 and 2: Pre-op bitewing radiograph of the 2nd and 3rd quadrant – the insufficient filling is clearly recognisable. The initial situation after rubber dam application with Gorilla-Floss ligatures on 25 and 26 is shown on the right. The ligatures push the rubber dam deep into the sulcus and allow high retraction of the gingiva. This significantly simplifies the treatment of deep caries defects. A heavy-gauge rubber dam is required for this. The punched holes in the rubber dam must not be too large, otherwise no inversion will occur. Without inversion of the rubber dam, the working area cannot be isolated.
Isolation
The treatment started with anaesthesia of the working area. The working area was then isolated with a heavy-gauge rubber dam (Isodam heavy 6x6). The master clamp is positioned as far distal as possible. In principle, a large isolation field is preferable for this type of treatment (sextant or quadrant isolation). An important step in isolation is punching the perforations in the rubber dam. A marking template is a useful tool for this. However, the perforations should not be too large, as this would make sufficient inversion considerably more difficult.
After application of the rubber dam, it was inverted at the tooth neck. This measure serves to seal the working area against liquids. Isolation is not complete without adequate inversion. Various techniques are available for this purpose. In this case, ligatures made of Gorilla Floss (very high stability and sturdiness) were chosen. These ligatures not only ensure inversion, but also retraction of the gingiva. This makes it much easier to restore deep cavities – as in this case.
Restoration
After removing the old filling, the cavity became visible (Fig. 3). This could now be extended in a minimally invasive manner while preserving the substance. In the process, undermining enamel portions were only removed until all carious dentine was accessible with the rose bur. After caries removal, the cavity was cleaned with the sandblaster (28 μm aluminium oxide) (Fig. 4). This procedure removes the resulting debris and improves the adhesive bond.
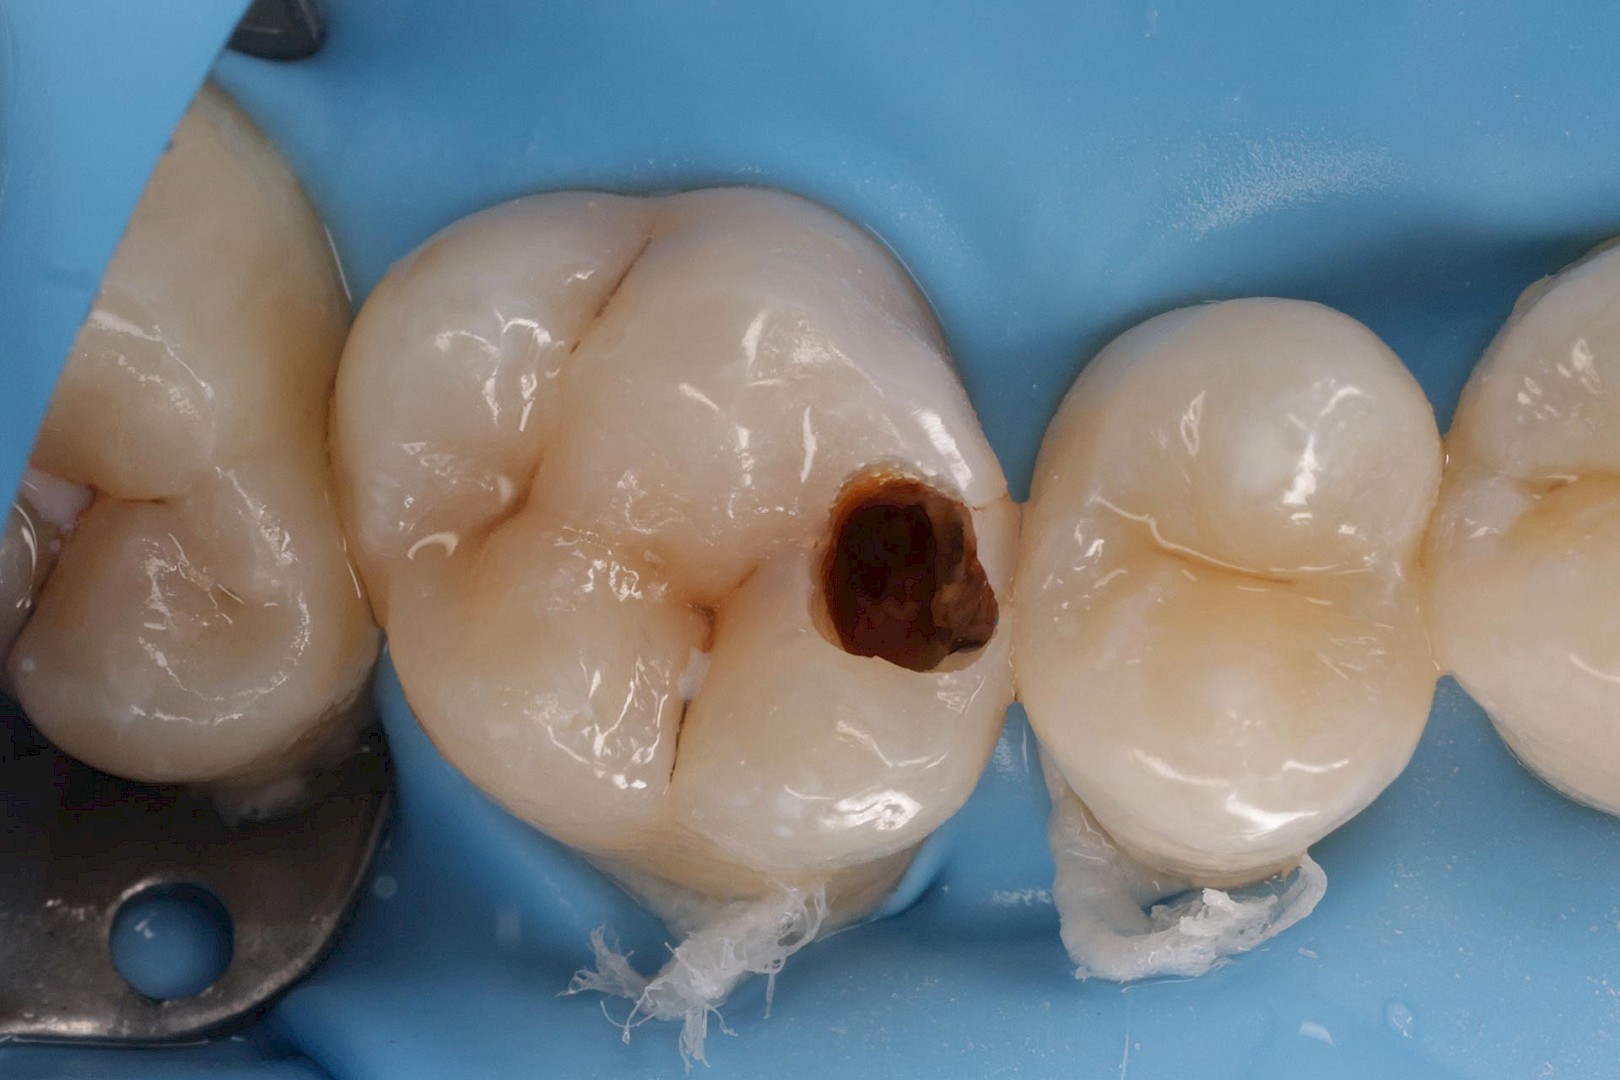
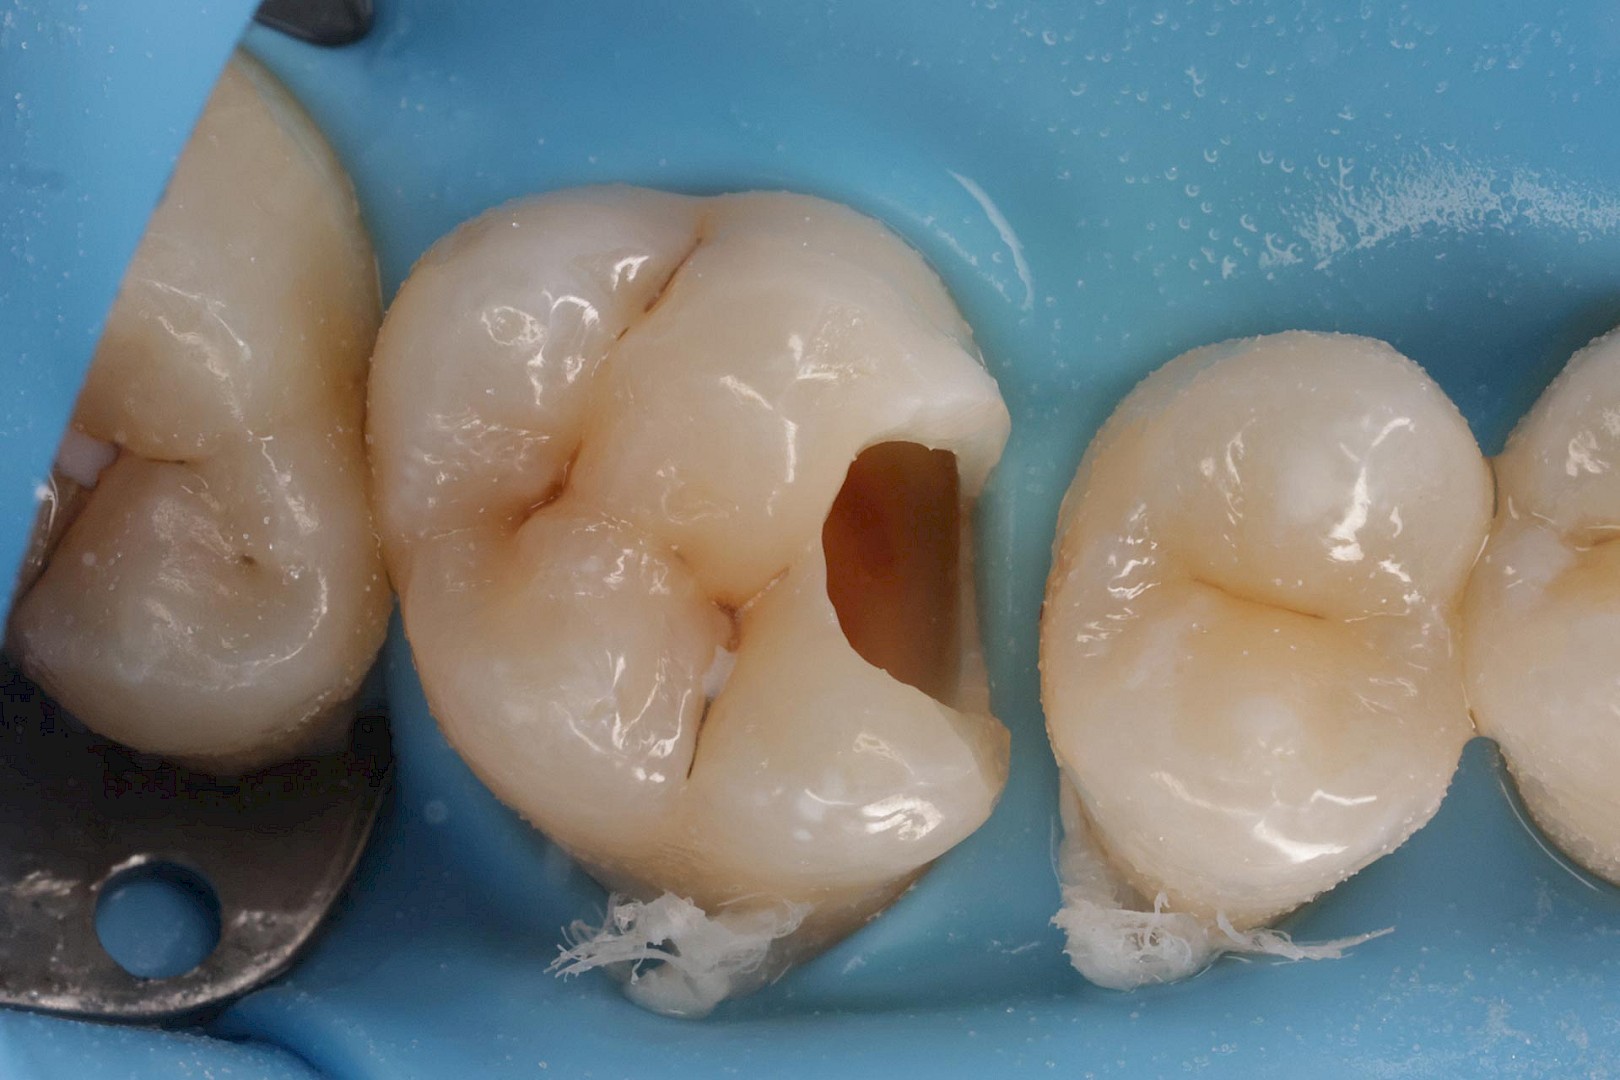
Fig. 3 and 4: Minimally invasive opening of the defect. The marginal ridge is weakened with the drill without completely breaking the contact. Depending on the size of the defect, the cavity is now widened. The figure on the right shows the situation after excavation and sandblasting of the defect. Blasting the cavity removes the debris caused by machining with diamond and rose burs. This additional ‘cleaning’ of the cavity with the sandblaster enables an optimal adhesive bond.
When inserting the matrix, make sure that it is not deformed. Only an optimised emergence profile ensures good hygiene. In cases like this, deep margin elevation is often necessary to guarantee optimum emergence. With deep margin elevation, the deep part of the cavity is built up first using a special matrix. The contact point is then restored using a normal matrix. The procedure works very well with consistent isolation, but takes more time as two work steps are necessary.
Without deep margin elevation, the wedge for fixing the matrix could deform it and thus severely impair emergence. However, in this case the more time-consuming deep margin elevation was avoided and a plastic wedge (Palodent V3 large wedge) was used instead to fix the matrix (Fig. 5). This does not deform the matrix, but still fixes it sufficiently. Unfortunately, the teeth are not separated as much by the plastic wedge. Separation is therefore carried out using the clamping ring (do not use clamping rings that are too worn!). Using the plastic wedge therefore saved time in the case shown.
Finally, the cavity was conditioned and bonded using the acid-etching technique (in the case shown, with Optibond FL). The restoration was carried out according to a tried and tested procedure:
- Step 1: Reconstruction of the marginal ridge with Estelite Asteria NE (Tokuyama Dental);
- Step 2: Dentine replacement with Estelite Asteria A3B (Tokuyama Dental);
- Step 3: Cusp-by-cusp technique of the central cusp slopes with Estelite Asteria OcE (Tokuyama Dental);
- Step 4: Supplementation of the peripheral morphology with Estelite Asteria WE (Tokuyama Dental)
- Step 5: Colouring the fissures with Inspiro Fissure (EdelweissDR).
Once the composite layering was completed, the entire restoration was cured again under glycerine gel. This removes the oxygen inhibition layer. This significantly improves polishability and considerably increases durability. After removing the excess composite, the restoration was pre-polished (EVE Rotary Twist System). The desired high gloss was finally achieved with goat hair brushes (Fig. 6 and 7).
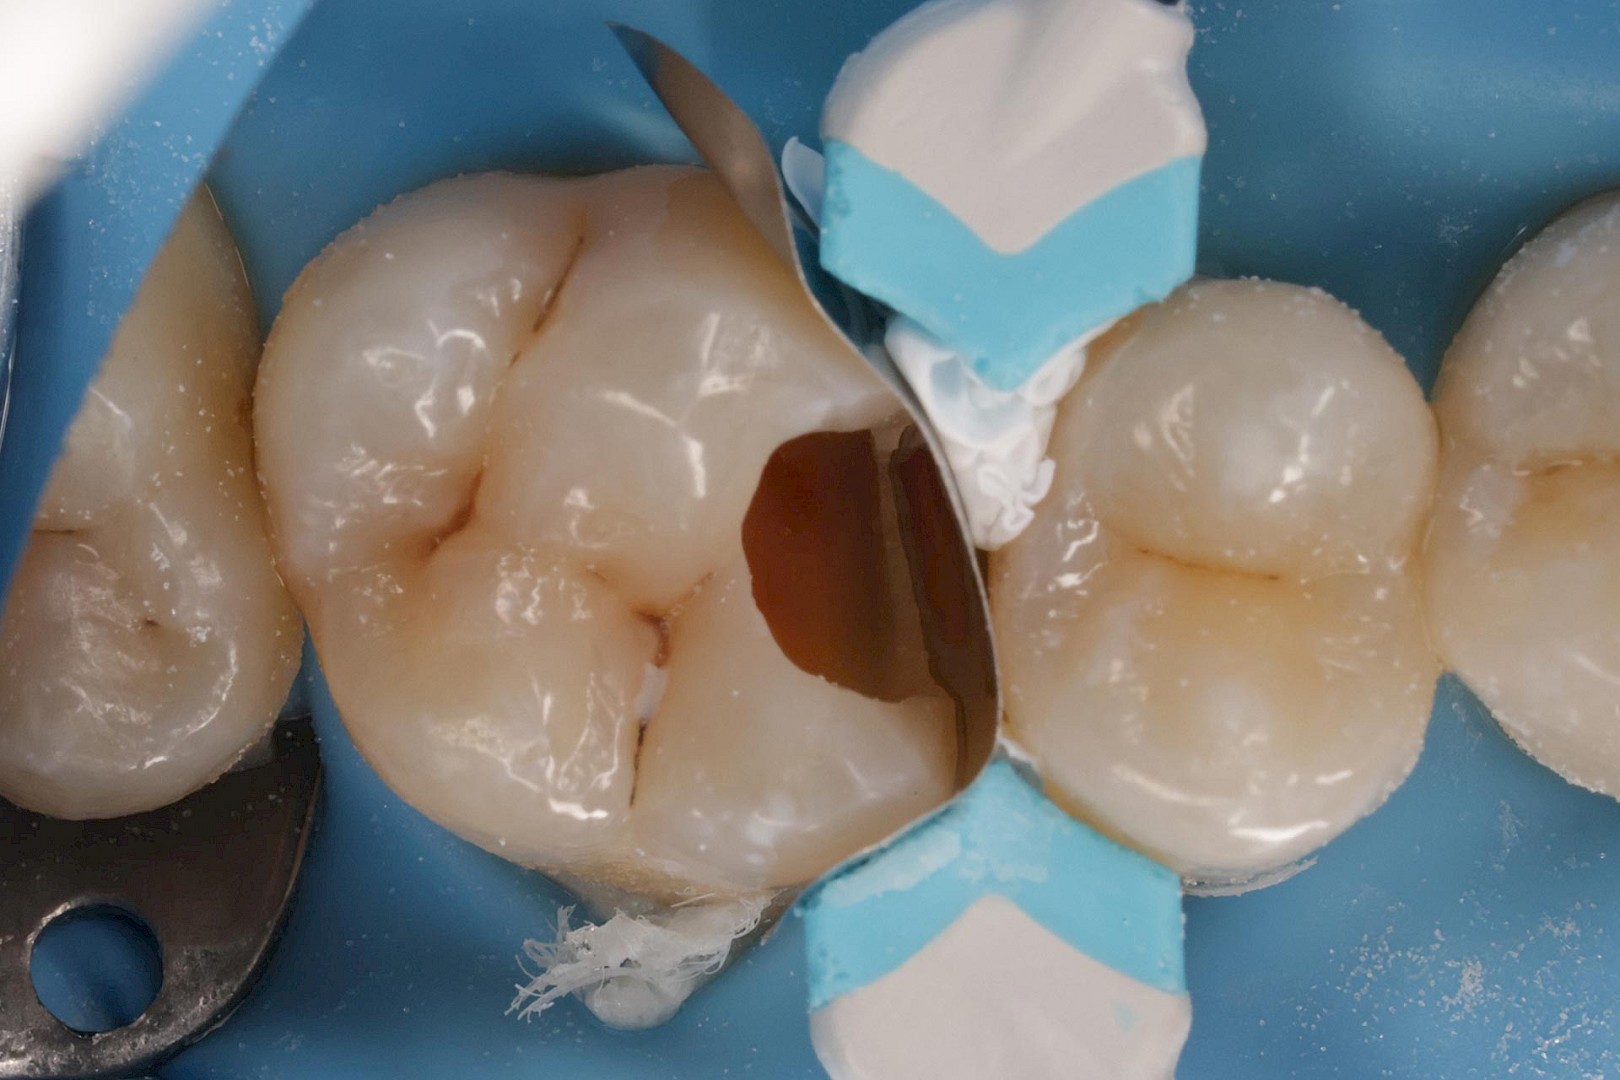
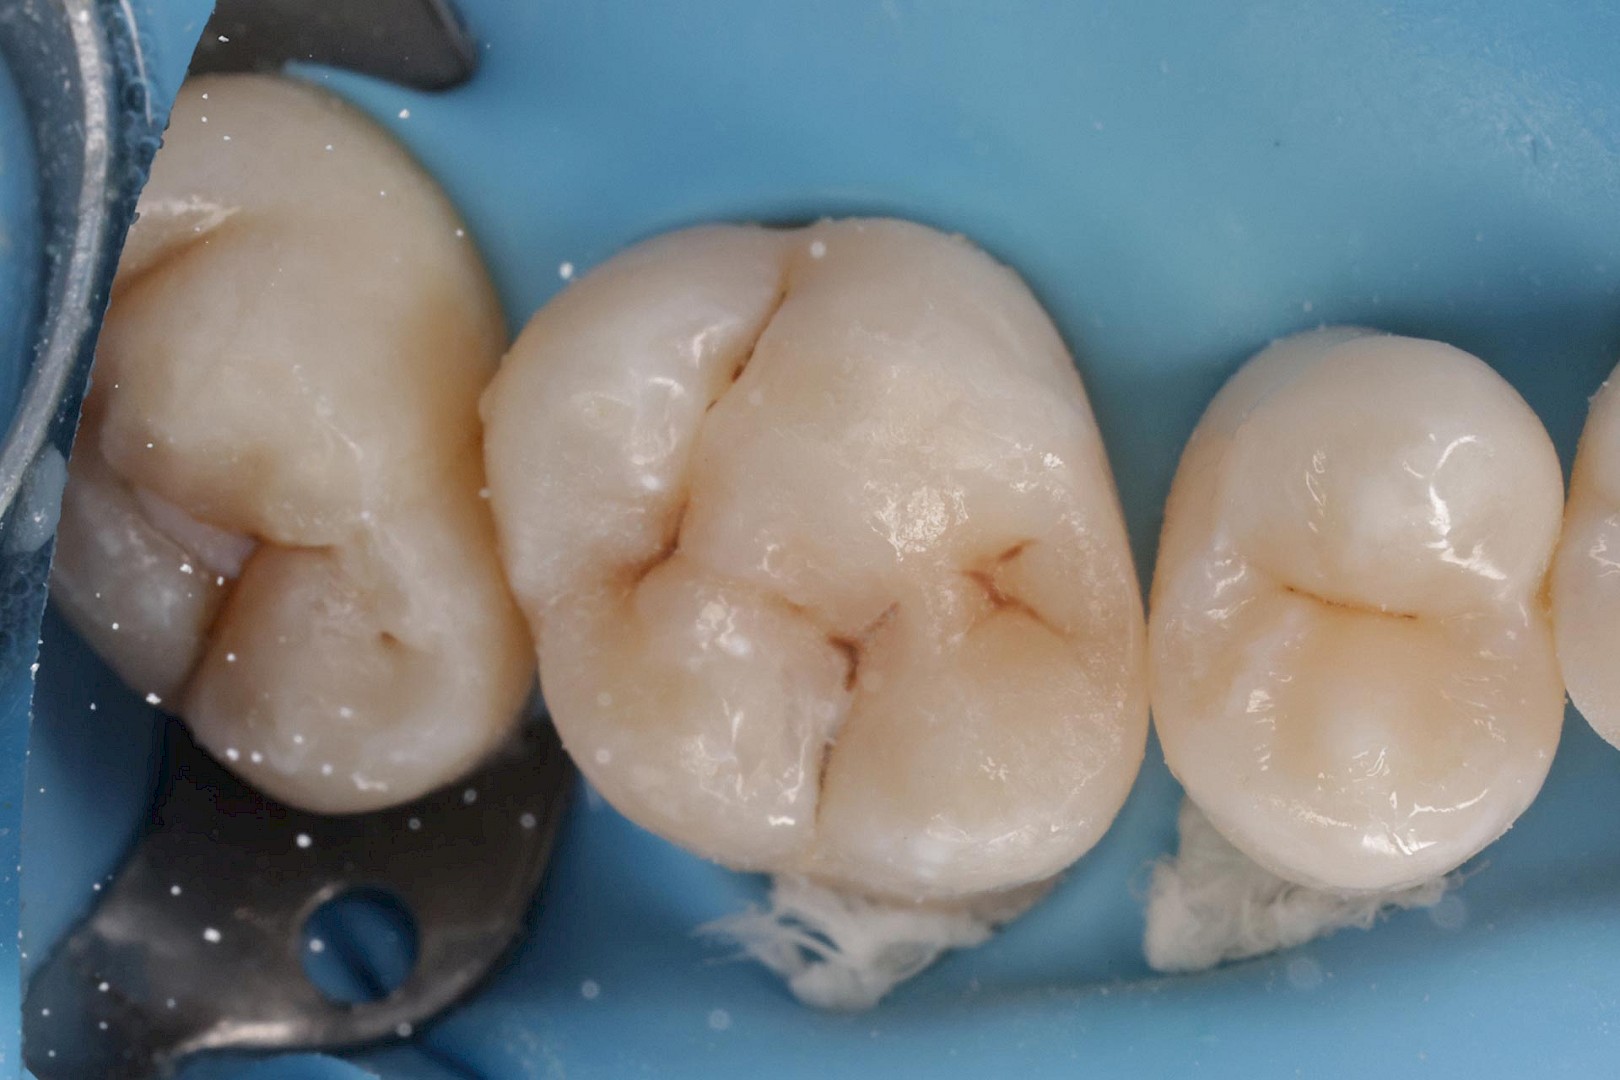
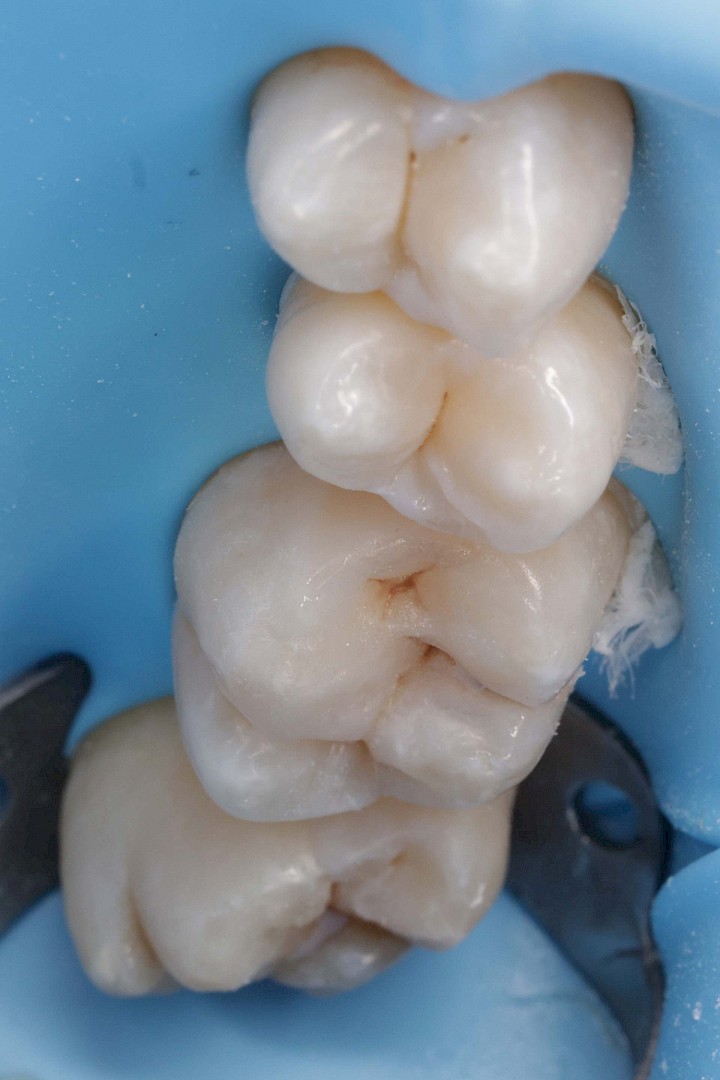
Fig. 5 and 6: Application of the matrix and the suitable clamping ring. In addition, a Teflon tape was inserted before the clamping ring was fitted. This significantly improves the adaptation of the matrix and reduces the effort required for later finishing. The wedge used is made of plastic, which generates less separation (the separation takes place more via the clamping ring) and does not deform the matrix in the cervical section. That is a great advantage. Otherwise, this cavity could only have been treated using deep margin elevation.
The figure on the right shows the occlusal view of the completed restoration with Estelite Asteria NE (marginal ridge) + A3B (dentine replacement) + OcE (central cusp slopes) + WE (lateral cusp slopes + marginal ridge morphology) + Inspiro Fissure (fissure colouring).
Fig. 7: Completed restoration – sagittal view
Conclusion
It is often the seemingly small, simple things that are full of surprises. Who would have thought that the patient, who had not complained of any symptoms, would have such an extensive lesion? Unfortunately, the bonding of the initial restoration was not sufficient to adequately seal the cavity.
In order to be able to achieve a good and, above all, long-term stable result for such lesions, it is therefore necessary to observe certain things such as carefully sealing the working area against liquid, attaching adequate ligatures for inversion, as well as preparation that is gentle on the substance but still practicable and the correct use of the matrix – not to forget etching and bonding lege artis as well as the restoration of the defect with the appropriate composites.
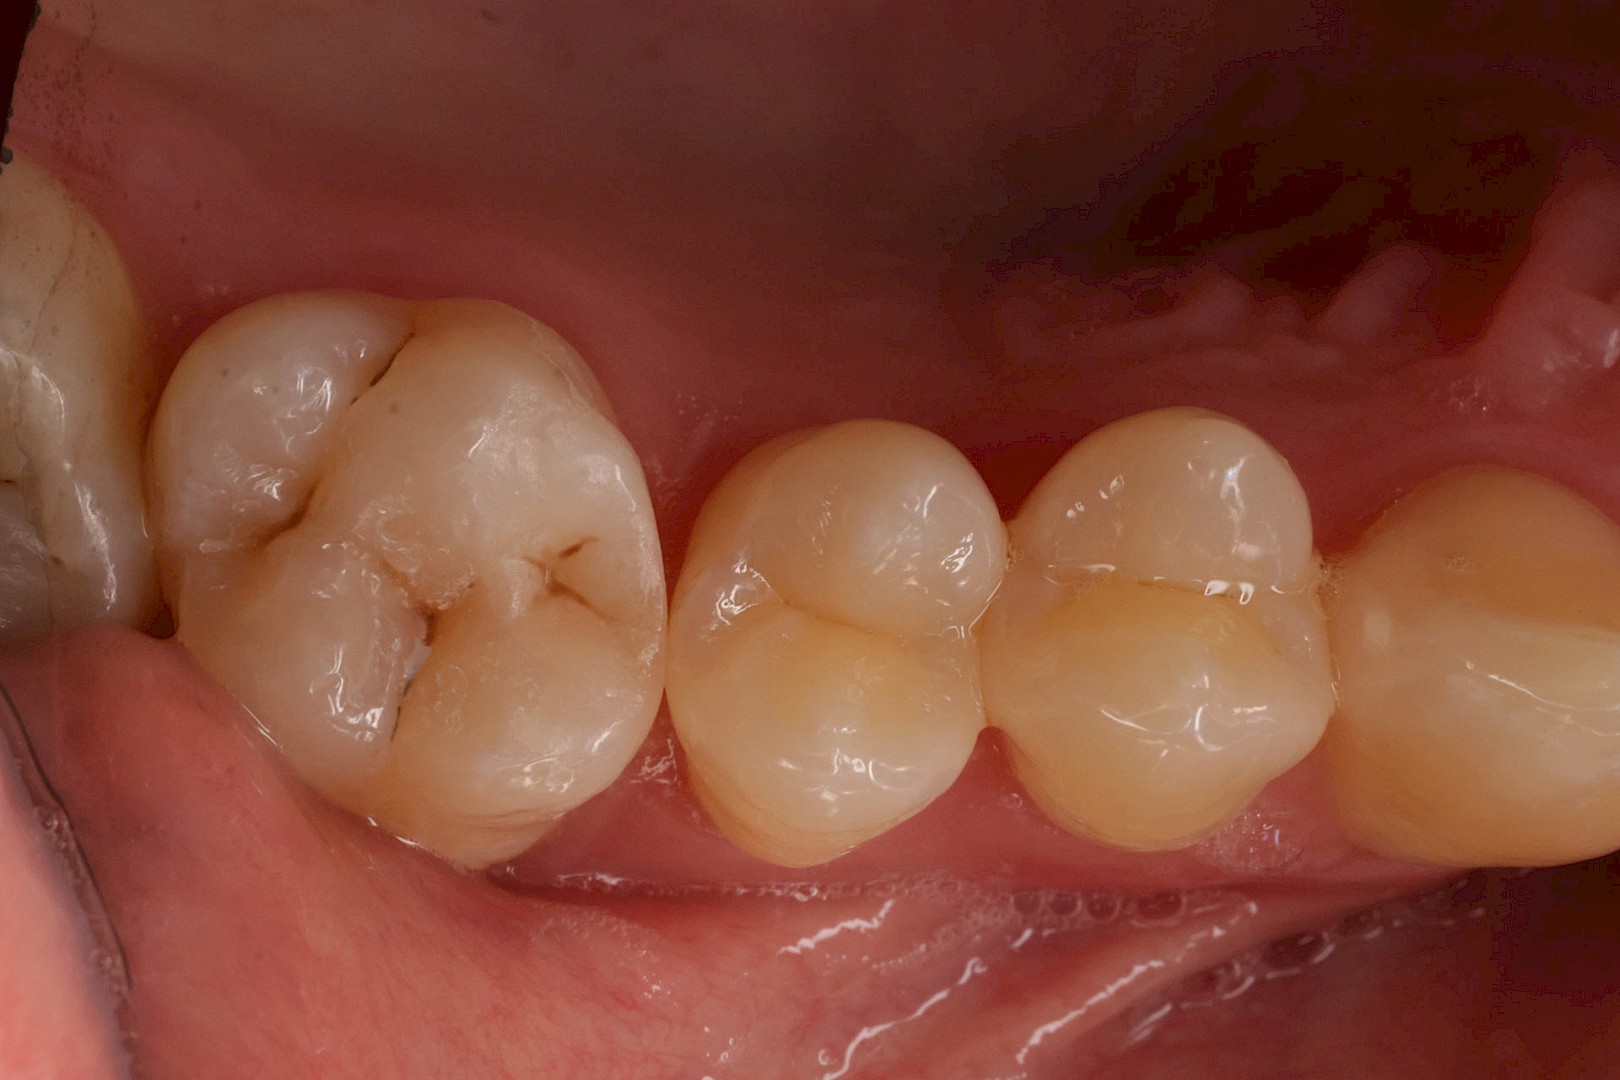
In this way, a composite restoration was achieved on tooth 26 that is not recognisable as such and absolutely fulfils its task of preserving the tooth and concealing the defect (Figs. 8 and 9).

Author:
Dr. Mathias Kühn
Dr. Mathias Kühn is a national and international speaker in the field of aesthetic dentistry. He is also an opinion leader for national and international dental companies. His professional activities have focussed intensively on all aspects of aesthetic dentistry for many years. His greatest motivation has always been to preserve the naturalness of teeth. The focus is not on the individual tooth, but always on the overall appearance. He uses all his knowledge and skills to fulfil the individual needs and wishes of his patients.